Zh:Microsoft Authentication Scheme
Minecraft正在迁移至微软账号。自2020年12月起,所有新账号已经使用了新版系统,旧的账号也将在之后迁移,详见这篇博文。
新版系统需要多个步骤以及不同的令牌,但是最后你还是回获得一个普通的Mineceaft令牌。启动游戏本身并没有改变。
微软OAuth流程

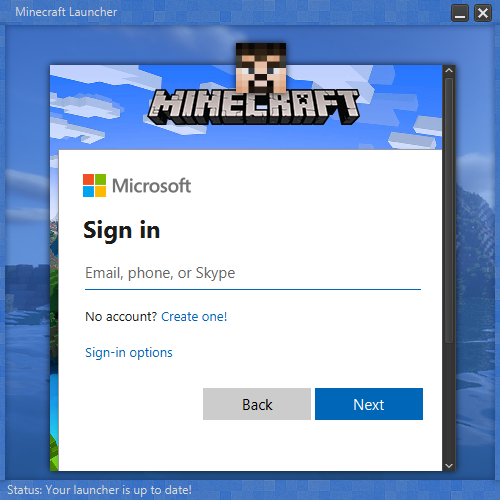
第一步,我们登入微软账号。这一步必须在浏览器/网页视图中完成!并没有测试其他的重定向链接,客户端id(client_id)被硬编码为(00000000402b5328),也就是Minecraft这个游戏的id。
https://login.live.com/oauth20_authorize.srf
 ?client_id=00000000402b5328
 &response_type=code
 &scope=service%3A%3Auser.auth.xboxlive.com%3A%3AMBI_SSL
 &redirect_uri=https%3A%2F%2Flogin.live.com%2Foauth20_desktop.srf
用户需要在此处输入用户名(邮箱、手机号或别的登录方法)以及密码。如果用户名和密码正确,那么用户会被重定向。在这一步中用户不需要拥有MC,那会在之后再检查。
重定向链接看起来会像这样:
https://login.live.com/oauth20_desktop.srf?code=codegoeshere&lc=1033
你需要提取出其中的code参数,这是你的微软授权码。
授权码 -> 授权令牌
下一步是从授权码中获取授权令牌。由于安全原因,这一步不在浏览器中完成。
POST https://login.live.com/oauth20_token.srf
Content:
 Map<Object, Object> data = Map.of(
    "client_id", "00000000402b5328", // 还是Minecraft客户端id
    "code", authcode, // 第一步中获取的代码
    "grant_type", "authorization_code",
    "redirect_uri", "https://login.live.com/oauth20_desktop.srf",
    "scope", "service::user.auth.xboxlive.com::MBI_SSL"
 );
不要忘记设置Content-Type: application/x-www-form-urlencoded
响应看起来会像这样:
 {
   "token_type":"bearer",
   "expires_in":86400,
   "scope":"service::user.auth.xboxlive.com::MBI_SSL",
   "access_token":"token here",
   "refresh_token":"M.R3_BAY.token here",
   "user_id":"889ed4a3d844f672",
   "foci":"1"
 }
我们需要关注到这里的access_token
用于刷新的token(refresh_token)
您可以使用您在之前请求中收到的refresh_token获取新access_token。只需调用与以前相同的API,请切换刷新的令牌authorization_code和授予类型的代码refresh_token
POST https://login.live.com/oauth20_token.srf
 client_id=<your client id>
 &client_secret=<your client secret>
 &refresh_token=<refresh token from previous step>
 &grant_type=refresh_token
 &redirect_uri=<your redirect uri>
(响应跟请求access_token一模一样)
XBL身份验证
现在,我们已通过微软身份验证,可以向xbox live进行身份验证。
我们需要发送:
 POST https://user.auth.xboxlive.com/user/authenticate
 {
    "Properties": {
        "AuthMethod": "RPS",
        "SiteName": "user.auth.xboxlive.com",
        "RpsTicket": "d=<access_token>" // 第二步中获取的访问令牌
    },
    "RelyingParty": "http://auth.xboxlive.com",
    "TokenType": "JWT"
 }
同样,也得设置Content-Type: application/json以及Accept: application/json
响应看起来会像这样:
 {
   "IssueInstant":"2020-12-07T19:52:08.4463796Z",
   "NotAfter":"2020-12-21T19:52:08.4463796Z",
   "Token":"token", // 保存它,这是你的xbl令牌
   "DisplayClaims":{
      "xui":[
         {
            "uhs":"uhs" // 保存它
         }
      ]
   }
 }
我们需要保存这里的Token和uhs。uhs是user hash的缩写,为用户信息哈希值。
XSTS身份验证
现在,我们已经通过XBL进行了身份验证,我们需要获取XSTS令牌,我们可以使用它来登录Minecraft。
 POST https://xsts.auth.xboxlive.com/xsts/authorize
 {
    "Properties": {
        "SandboxId": "RETAIL",
        "UserTokens": [
            "xbl_token" // from above
        ]
    },
    "RelyingParty": "rp://api.minecraftservices.com/",
    "TokenType": "JWT"
 }
同样还是设置Content-Type: application/json以及Accept: application/json
响应看起来会像这样:
 {
   "IssueInstant":"2020-12-07T19:52:09.2345095Z",
   "NotAfter":"2020-12-08T11:52:09.2345095Z",
   "Token":"token", // 保存它,这是你的xsts令牌
   "DisplayClaims":{
      "xui":[
         {
            "uhs":"" // 与上个请求相同
         }
      ]
   }
}
Minecraft身份验证
现在,我们终于可以回到Minecraft身上了,上一各请求中获取的XSTS令牌允许我们验证Minecraft。
 POST https://api.minecraftservices.com/authentication/login_with_xbox
 {
    "identityToken": "XBL3.0 x=<uhs>;<xsts_token>"
 }
响应:
 {
  "username" : "some uuid", // 这并不是账号的uuid
  "roles" : [ ],
  "access_token" : "minecraft access token", // jwt,你的老朋友Minecraft访问令牌
  "token_type" : "Bearer",
  "expires_in" : 86400
 }
这个访问令牌(access_token)允许我们启动游戏,但是,我们甚至还没有检查该账号是否拥有游戏。之前我们做的所有工作都是与微软账号进行的!
检查游戏拥有情况
那么现在让我们使用MC的访问令牌来检查该账号是否包含产品许可。
GET https://api.minecraftservices.com/entitlements/mcstore
访问令牌在验证文件头中:Authorization: Bearer token
如果用户拥有游戏,那么响应会看起来像这样:
 {
  "items" : [ {
    "name" : "product_minecraft",
    "signature" : "jwt sig"
  }, {
    "name" : "game_minecraft",
    "signature" : "jwt sig"
  } ],
  "signature" : "jwt sig",
  "keyId" : "1"
 }
第一个jwts会包含值:
 {
  "typ": "JWT",
  "alg": "RS256",
  "kid": "1"
 }.{
  "signerId": "2535416586892404",
  "name": "product_minecraft"
 }.[Signature]
最后一个jwt看起来是这样解码的:
 {
  "typ": "JWT",
  "alg": "RS256",
  "kid": "1"
 }.{
  "entitlements": [
    {
      "name": "product_minecraft"
    },
    {
      "name": "game_minecraft"
    }
  ],
  "signerId": "2535416586892404"
 }.[Signature]
如果该账号没有拥有游戏,那么项目为空。
获取档案
现在我们知道了该账号拥有游戏,那么可以获取他的档案来得到uuid:
GET https://api.minecraftservices.com/minecraft/profile
同样,访问令牌在验证文件头中:Authorization: Bearer token
如果账号拥有游戏,响应看起来会像这样:
 {
  "id" : "986dec87b7ec47ff89ff033fdb95c4b5", // 账号的真实uuid
  "name" : "HowDoesAuthWork", // 该账号的mc用户名
  "skins" : [ {
    "id" : "6a6e65e5-76dd-4c3c-a625-162924514568",
    "state" : "ACTIVE",
    "url" : "http://textures.minecraft.net/texture/1a4af718455d4aab528e7a61f86fa25e6a369d1768dcb13f7df319a713eb810b",
    "variant" : "CLASSIC",
    "alias" : "STEVE"
  } ],
  "capes" : [ ]
 }
否则会看起来像这样:
 {
  "path" : "/minecraft/profile",
  "errorType" : "NOT_FOUND",
  "error" : "NOT_FOUND",
  "errorMessage" : "The server has not found anything matching the request URI",
  "developerMessage" : "The server has not found anything matching the request URI"
 }
那么这样就可以知道所有必要的数据(MC访问令牌、用户名和uuid)来启动游戏了。干的漂亮!
示例实现
这里有个简易的Java示例实现(使用了javafx和它的webview):https://github.com/MiniDigger/MiniLauncher/blob/master/launcher/src/main/java/me/minidigger/minecraftlauncher/launcher/gui/MsaFragmentController.java 。